Introduction - Tileable Textures - Intermediate Bump Mapping - Advanced Bump Mapping
Easy Bump Mapping
This section deals with bump mapping at its most basic. It will introduce you to a way of creating bump maps quickly and easily. It is a simple method that should work for a large number of textures. We'll also be detailing how to get your texture and bump map in-game, using Tool and Guerilla.
1) If you followed the previous Tileable Textures tutorial, load your finished brick texture into The GIMP. If you didn't follow that tutorial and the terms 'Offset' or 'Clone Stamp' mean nothing to you, please go back and work through it, because the techniques shown to you in that section will be essential to making bump maps.
If you already know about making tileable/seamless textures but didn't follow the previous tutorial, the finished brick texture can be downloaded here. You'll need it to work through this section.
2) As you may know, bump maps are grayscale images where white equals high, black equals low and the various shades of gray representing the values in between. So, the first thing we need to do is convert the image to Grayscale by selecting Image>Mode>Grayscale from the menu above the texture.
3) You can see that the mortar lines around the bricks are a darker shade of gray than the bricks. This is handy for us because they are also the lowest points on a physical brick wall. So what we need is a way to separate the mortar lines as pure black and the bricks as pure white. This can be easily done using the Contrast and Brightness tools.
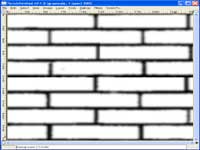
From the menu, select Layer>Colors>Brightness-Contrast. Move the two sliders around to the right until your image looks similar to the one below (the values that I used are Brightness: 23, Contrast: 127, but your image may look better at different settings).

4) The edges here are pretty harsh and won't look good when used as a bump map, so we will need to blur the image. From the menu, select Filters>Blur>Gaussian Blur(IIR). A small window will pop up asking how much you want to blur the image. Enter 5.0 into both boxes (when using other images, you will probably need to blur by a different amount, but 5 will do fine for this example).
5) Offset the image by selecting Layer>Transform>Offset from the menu. Press the button marked 'Offset by (x/2),(y/2)', then hit OK.
6) The blurring has caused the image to be mismatched around both the horizontal and vertical edges, so you will want to use the Clone Stamp tool to smooth it all out, just like we did in the previous section. However, this time you will want to be much more specific about the points you clone from. Aim to smooth the edges by painting over them with the lines that already exist, as seen in the picture below.
 |
 |
| Harsh Edges From Blurring (click to enlarge) |
Direct Cloning From Existing Lines (click to enlarge) |
7) Once you're happy with the way the horizontal and vertical edges look, return the image back to normal by using the Offset command again.
8) The bump map is now ready to be saved as a .tif file (the Halo Editing Kit requires bump maps to be saved as .tif files). If you've used more than one layer in your image (it tells you how many layers you're using in the blue window at the top of the image), then you'll need to merge them all using Layer>Merge Down before saving.
Save the file in the same directory that you loaded it from and don't forget to give it a different name from the original texture, or you'll overwrite it.
9) Run Tool using the following command:
tool bitmap <path to your brick texture>
For example, if your map was named 'Box' and you had saved the brick texture as 'bricks', you would type in:
tool bitmap levels\test\box\bitmaps\bricks
10) Repeat step 9, but this time for the bump map you just created. Don't worry when it gives you a warning message, Tool doesn't have all of the information it needs at the moment for the bump map, but we will be fixing this soon.
11) Open Guerilla and select File>New from the top menu. Select 'shader_environment' from the pulldown menu in the window that pops up.
12) Our brick wall is made of stone so select 'stone' from the pulldown menu under the 'Physics Properties' section.
 |
| Select Stone (click to enlarge) |
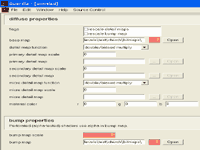
13) Scroll down to the 'Diffuse Properties' section and hit the button with three dots next to the 'Base Map' tab. Within the window that pops up, locate where you saved the brick texture, click on it then hit 'Open'.
Under the 'Bump Properties' section, insert 1 into the 'Bump Map Scale' tab. Click on the three dots next to the 'Bump Map' tab, then point it towards your bump map.
 |
| (click to enlarge) |
14) From the top menu, select File>Save As. Rename the file so it matches the name of the original texture. For example, if the original texture was 'bricks', rename the file to 'bricks.shader_environment'. The location where you need to save the file is a little different from before so be careful; if your map is called 'Box', save the file to: tags\levels\test\box\shaders.
15) Now, click on the 'Open' button next to the 'Bump Map' tab, under the 'Bump Properties' section. This will open a new window which contains the data relating to your bump map.
16) Use the pull down menu under the 'Format' section to select '32-bit color'. Use the pull down menu under the 'Usage' section to select 'height map'. Still under the 'Usage' section, tick the box labeled 'disable height map compression'.
17) Scroll down to the section called 'Post Processing' and enter 0.2 into the 'Bump Height' tab. This controls the depth of the bump map and the number entered must be between 0 and 1. Zero equals no bump height and one equals total depth (so only use values in between). It's worth noting that higher values tend to not to look very good, so it's best to stick to numbers under 0.3.
18) Scroll to the very bottom section, named 'Bitmaps' and untick the box beneath it labeled 'compressed'.
19) Using the menu, select File>Save. Exit Guerilla.
20) Repeat the command in Tool that you used in step 9, but this time only on the bump map. You should see that there is no warning message now.
21) Use the brick texture on a surface in Max, just as you would normally, then compile the map using Tool. The texture should appear where you have placed it and will now react to dynamic lights with the bump map. (Note that bump maps are more visible in darker areas, so if the Radiosity power of the sky you are using is very high, it may be hard to make out the bump mapping of textures that are in direct sunlight.)
 |
| Finished Texture And Bump Map In-Game (click to enlarge) |