Introduction - Tileable Textures - Easy Bump Mapping - Advanced Bump Mapping
Intermediate Bump Mapping
In the previous section we separated the grayscale image into pure black and white to create a very simple bump map. In this section we will be using a variety of techniques to create something with much more detail. Before we start, download this texture and save it into the bitmaps folder of your map directory. For example, if you were making a map called 'Box', you would save the picture in: HaloCE\data\levels\test\box\bitmaps. Now load the image into The GIMP. It's already been made seamless, so there's nothing you need to do to it.
1) Convert the image to Grayscale by selecting Image>Mode>Grayscale from the menu above the texture.
2) Copy the image into a separate layer by selecting Layer>Duplicate Layer. Now activate the Layers window by selecting Dialogs>Layers, then select the top layer.
 |
| Select The Top Layer |
3) From the menu, select Layer>Colors>Brightness-Contrast. Move the two sliders to the values of Brightness: 60, Contrast: 127. Your image will now look like the one below.
 |
| (click to enlarge) |
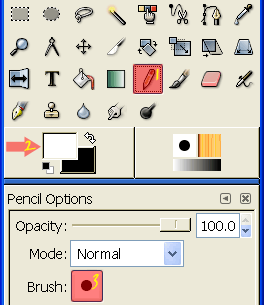
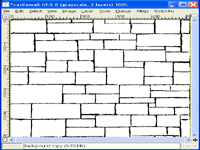
4) You'll notice that this time there are a lot more patches of black within the bricks themselves. This is because the source image is more complex and has a greater variety of heights and patterns on the bricks. We will eventually represent this with the bump map, but for now we need to paint over these patches using the pencil tool. Make sure your paint colour is set to pure white and your brush type is a solid circle.

Paint within all of the bricks that have black patches until your image resembles the one below.
| (click to enlarge) |
5) From the menu, select Filters>Blur>Gaussian Blur(IIR). A small window will pop up asking how much you want to blur the image. Enter 5.0 into both boxes.
6) Click on the Layers window and deselect the eye symbol to the left of the top layer. This makes the top layer invisible. Now click on the bottom layer so we can work on it.

7) You can see from this layer that the differing colours of the original image make some bricks noticeably darker than others. From what we know of bump maps, this will make the whiter ones stick out more. We obviously don't want this to happen since the bricks on a real wall will all be relatively the same distance out.
What we have to do here is adjust the Contrast and Brightness so that enough of the texture of the bricks is visible, while lessening the difference in colour of the individual bricks. Select Layer>Colors>Brightness-Contrast. I found a Brightness of 50 and a Contrast of 50 to work well, but you may try different settings if you wish.
8) Now select Layers>Colors>Auto>Stretch Contrast. What this does is ensure that the darkest part of the image is as dark as it can be and the lightest part as light as it can be. This is a very useful tool to stabilize a bump map when you've had to raise the brightness very high in order to get a good result.
9) We need to blur this layer very slightly so that the bump mapping isn't horribly sharp, so select Filters>Blur>Blur. Hit OK in the window that appears; the default settings will be fine.
10) Go to the Layers window and activate the top eye again, then click on the top layer. Now move the Opacity slider until it reads roughly 85 (it's hard to get it exact). Don't worry that you can't see the layer underneath very clearly, the slight shades of gray will be picked up in the bump map.
11) Merge the two layers into one whole image using Image>Merge Visible Layers.
The reason we used two layers for this example is because overuse of the Brightness-Contrast tool results in a lack of definition. We had to get the deep parts around the brick to be clear, yet also have the subtleties of the brick texture. This is not something that's possible with the use of just one layer.
12) Changing the opacity like we did in step 10 will have reduced the overall lightness of the image, so once again run Layers>Colors>Auto>Stretch Contrast, so we get as much depth as possible.
13) Offset the image by selecting Layer>Transform>Offset from the menu. Press the button marked 'Offset by (x/2),(y/2)', then hit OK. Check to see if there are any harsh edges and then fix them using the techniques you learned from the previous two parts of this tutorial. When you're finished, offset the image again to return it to normal.
14) Save the bump map as a .tif file in the same directory that you loaded it from and don't forget to give it a different name from the original texture, or you'll overwrite it.
15) Repeat stages 9-21 from Easy Bump Mapping for the new texture and bump map.
 |
| Finished Texture And Bump Map In-Game (click to enlarge) |
