Introduction - Easy Bump Mapping - Intermediate Bump Mapping - Advanced Bump Mapping
Tileable Textures
This section deals with making seamless textures from images that have patterns but can't be used as tiled texture maps because their edges don't match. It will be worth working through this part of the tutorial even if you don't plan on making your own textures, because it introduces the power of The Gimp's 'Offset' command, as well as explaining how to use the Clone Stamp tool. We will also be using the finished texture that you make in this section to create a bump map in 'Easy Bump Mapping'.
 |
 |
| Original Non-Seamless Texture (click to enlarge) |
Bad Tiling Because Edges Don't Match (click to enlarge) |
1) The first thing you need to do is download the Original Non-Seamless Texture above (right click on it, then select 'Save Target As') and save it into the bitmaps folder of your map directory. For example, if you were making a map called 'Box', you would save the picture in: HaloCE\data\levels\test\box\bitmaps.
2) Load the texture into The GIMP using the File>Open menu at the top of the main window.
3) As you can see from the second picture above, the edges do not match and so the texture looks terrible when it is tiled. What we need to do is cut out an area where we know the texture repeats itself. Looking at the image, we can see that the pattern is repeated for every one brick width horizontally, and every two layers of brick vertically.
 |
| Area Of Pattern Repetition (click to enlarge) |
While we could easily make a tileable texture from just one of those red squares, this is something that you will usually want to avoid doing. The reason for this is that when you restrict your texture to such a small sample, it lacks variety when it is tiled. In short: it looks fake and unnatural.
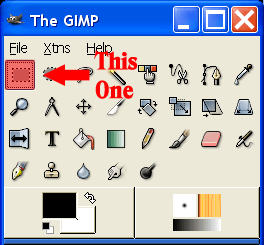
So, we will want to select a large area of pattern repetition using the Rectangular Region tool in the top left of the toolbox, as shown below.
 |
4) Select an area of the image like that indicated in the example picture below. It doesn't matter if you don't get it 100% correct, we will be editing the edges later on anyway. You may want to zoom in for better accuracy (the Zoom tool is directly below the Rectangular Region tool).
 |
| Select An Area Similar To This (click to enlarge) |
Note that I have avoided the black line of mortar in the top of my selection area, but included it at the bottom. Likewise, I have avoided the mortar lines at the left hand side, while including them on the right. If you don't do this then your pattern will have both sets of mortar lines when it is tiled. This results in two black bands and a number of smaller bricks. Not good.
 |
| Doublebanding: Rubbish (click to enlarge) |
5) Copy the selected area of the image by selecting Edit>Copy from the menu above the image.
6) Create a new window by selecting File>New from the menu, then hit OK.
7) Paste the selected area of the image into the new window by selecting Edit>Paste from the menu.
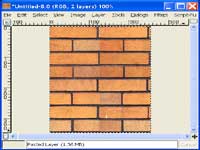
8) From the menu above the image, select Layer>Transform>Offset. Press the button marked 'Offset by (x/2),(y/2)', then hit OK. Your image should now look something like this:
 |
| The Offset Image (click to enlarge) |
What this has done is taken edges of the image and pushed them together so you can see how they line up. This is exactly how the edges of your texture would look when tiled in-game. You can see that although the seams match up pretty well, there are some very noticeable differences in colour.
Now we come to the real power of the 'Offset' command: we can edit the image in this state to make it appear as though it were a naturally tiled texture.
|
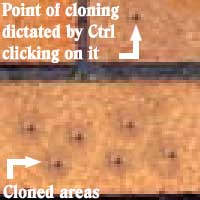
9) Select the Clone Stamp tool, then the brush selector option, then Circle Fuzzy (07), exactly as is shown in the diagram to the right. The Clone Stamp tool allows you to copy an area of an image and paint it wherever you like. This is very useful for us, since it will allow us cover up the edges that don't match using other parts of the image. This makes it much more powerful than simple smearing or blurring and as a result will look much more convincing and natural. You may actually use any size of brush you wish. When dealing with larger or smaller images than the one we have here, or if you just want to be more/less accurate, it's a very good idea. But for now, a size 7 brush will work well. Choosing a fuzzy brush is almost always the best option though, because when you paint with the Clone tool it will mix better with what you're painting on and won't leave any hard edges. 10) The Clone Stamp tool is very easy to use: just hold down the Ctrl key and aim the mouse at the point on the image that you want to copy from, then click the left mouse button. Now whenever you paint onto the image, it will be cloned from the point you just designated.
You should find it much easier and more accurate when working zoomed in on the image. You'll only be painting over a very small area anyway. | 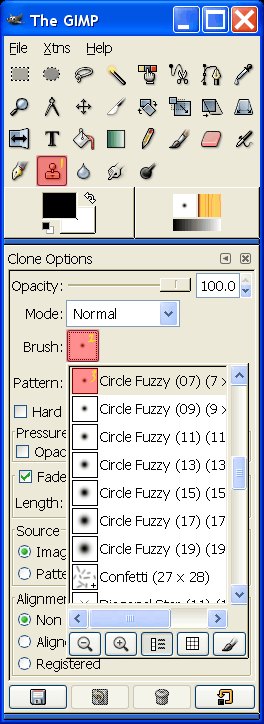 |
Holding down the mouse button while moving the mouse will also draw the area around the point you designated, up to the maximum number of pixels indicated in the 'Fade Out' section of the Clone Options (the default is 100 pixels). Letting go of the mouse button then drawing again will cause the cloning to reset back to the point you designated.
11) Use the Clone tool to get rid of the harsh edges by painting across them from different sides. You'll want to use a lot of different cloning points to a get natural non-repetitive seam. Check the picture below to see how the edges and colours are much smoother on the top half, which has been worked on, compared to the bottom, which has had nothing done to it.

|
| Smoothing The Edges (click to enlarge) |
Don't be afraid to use clone points from anywhere on the image in order to get a good result. The only rule here is: If it makes the seam look like a naturally tiled texture, it's fair game.
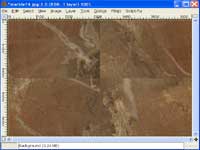
The example here doesn't have a horizontal harsh edge because the way original image was cut, it lined up nicely on the top and bottom. If you have a horizontal edge, you would use the Clone Stamp tool on it just as you have done to the vertical edge.
|
| Most Textures Have Horizontal &
Vertical Harsh Edges (click to enlarge) |
12) Once you're happy with the way the edges look, you'll need to return the image back to normal by using the 'Offset' command again. From the menu above the image, select Layer>Transform>Offset. Press the button marked 'Offset by (x/2),(y/2)', then hit OK.
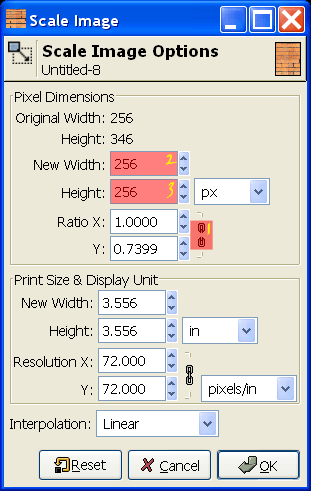
13) Before the texture can used with Halo, the pixel size must be a power of two (ie. 2, 4, 8, 16, 32, 64, 128, 256, 512, 1024 or 2048 pixels in width or height). The image I have is 256x346. Yours may be different by a small amount, but that doesn't matter, we're going to be converting it to a 256x256 pixel texture.
From the menu above the image, select Image>Scale Image. In the window that pops up, make sure that the top chain link is broken (so that the width and height are not linked), then enter 256 into the New Width box and 256 into the Height box. Click on OK.
14) The texture is now ready to be saved as a .tif file (the Halo Editing Kit requires textures to be saved as .tif files). If you've used more than one layer in your image (it tells you how many layers you're using in the blue window at the top of the image), then you'll need to merge them all using Layer>Merge Down before saving.
Save the file in the same directory that you loaded it from. You're now ready to create a basic bump map for this texture, so move on to the next section.
|
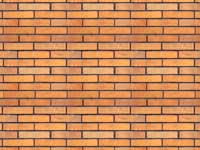
| A Successfully Tiled Texture (click to enlarge) |
