Tileable Textures - Easy Bump Mapping - Intermediate Bump Mapping - Advanced Bump Mapping
DISCLAIMER:
This is not a tutorial on how to use any of the Halo Editing Kit components or 3DS/G Max. You will need a basic competence with these tools in order to follow this tutorial. If you are having trouble with the HEK, read the documentation and tutorial that came with it.
IMPORTANT!
In order to follow this tutorial you will need a copy of The GIMP. Stop laughing! It's a powerful image editing program that is free to download. There are two reasons why I'm writing the tutorial using this program:
1) So that everyone can use the same instructions without having to spend time figuring out what the equivalent commands are on their favourite Image Processing package.
2) I make extensive use of the 'Offset' command to create seamless textures and bump maps. It's essential to this tutorial and I don't know of any other program that has it. So if you're using Photoshop and you want to know how to get your texture to 'Offset' like I've shown you, don't email me, because I don't know.
Anyway, this tutorial is quite in-depth, so don't worry if you haven't used The GIMP before, there'll be plenty of instructions and lots of helpful pictures. You can get the latest version of The GIMP here. You'll also need to download and execute the GTK+2 program at the top of that page before installing The GIMP, or it won't work.
CONTACT
If you have any questions, spot any mistakes or have suggestions on how to make the tutorial better, email me.
Introduction
Now that I've got that out of the way, welcome to The Halo CE Bump Mapping Tutorial. I hope to ease you through the various stages of getting bump maps working in-game and have provided three varying degrees of difficulty to work through. If you're unfamiliar with how to make tileable textures (ie. seamless when you repeat them) then you should do that tutorial first, since it's not only invaluable when it comes to making your own textures, but the techniques used in it will appear in all of the other stages of bump mapping.
You don't have to read all of this introductory section, but it will help you to understand exactly what it is that you are doing.
What is bump mapping?
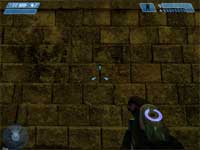
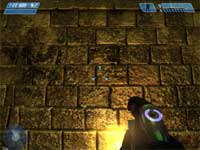
Simply speaking, bump mapping is a way to make flat surfaces react to light as if they were three dimensional. This is a fairly old technique in computer graphics, but it has only recently been used in games due to advances in video card hardware. The reasons for using bump mapping are many, but suffice to say that it helps make games look a lot more realistic.
 |
 |
| Without Bump Mapping (click to enlarge) |
With Bump mapping (click to enlarge) |
How does it work?
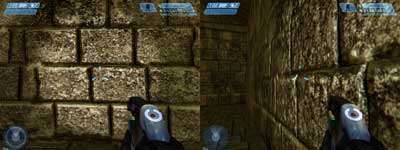
The way this is achieved is to overlay a grayscale image onto a surface. In this grayscale, white is equal to high (sticks out the most), black is equal to low (the deepest part) and gray is somewhere in between. The game engine will consult this grayscale image when a dynamic light is activated. It then shades the texture according to the angle that the light is hitting the surface.
 |
| Bump Maps React To Light From Different Angles (click to enlarge) |
What is a dynamic light?
Basically, this is a light source that is not part of the original lightmap created for a level (in Halo this lightmap is called 'Radiosity'). The original lightmap is static and does not change. Dynamic lights, however, can:
1) Change in both colour and intensity
2) Move around
3) Affect bump mapping
Without a dynamic light source affecting it, a bump map is totally invisible. This is because the texture it would shade will appear completely flat. Dynamic light sources specific to Halo are:
1) The flashlight
2) The headlights from both the Warthog and the Scorpion
3) Muzzle flashes from various guns as they are fired
4) Grenades, Fuel Rod Gun and Plasma Pistol Overcharge
projectiles
5) Explosions from the Needler, Rocket Launcher and Grenades
6) Special kinds of scenery objects